 |
Trigger & Relay Plugin 1.0.0
Easy signal setups done right
|
|
Trigger & Relay Plugin 1.0.0
Easy signal setups done right
|
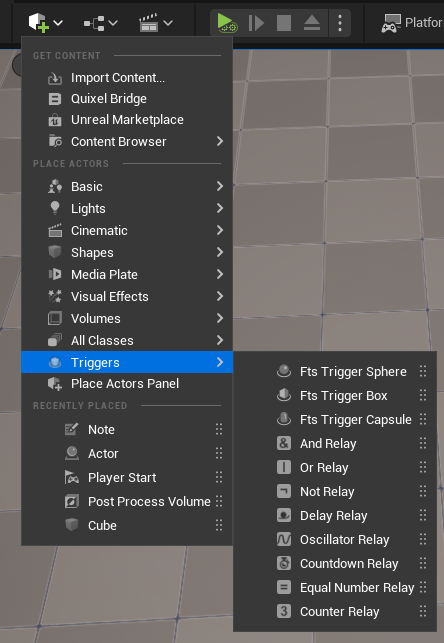
After installing the plugin you can open the menu Add -> Triggers and drag in actors to the level.
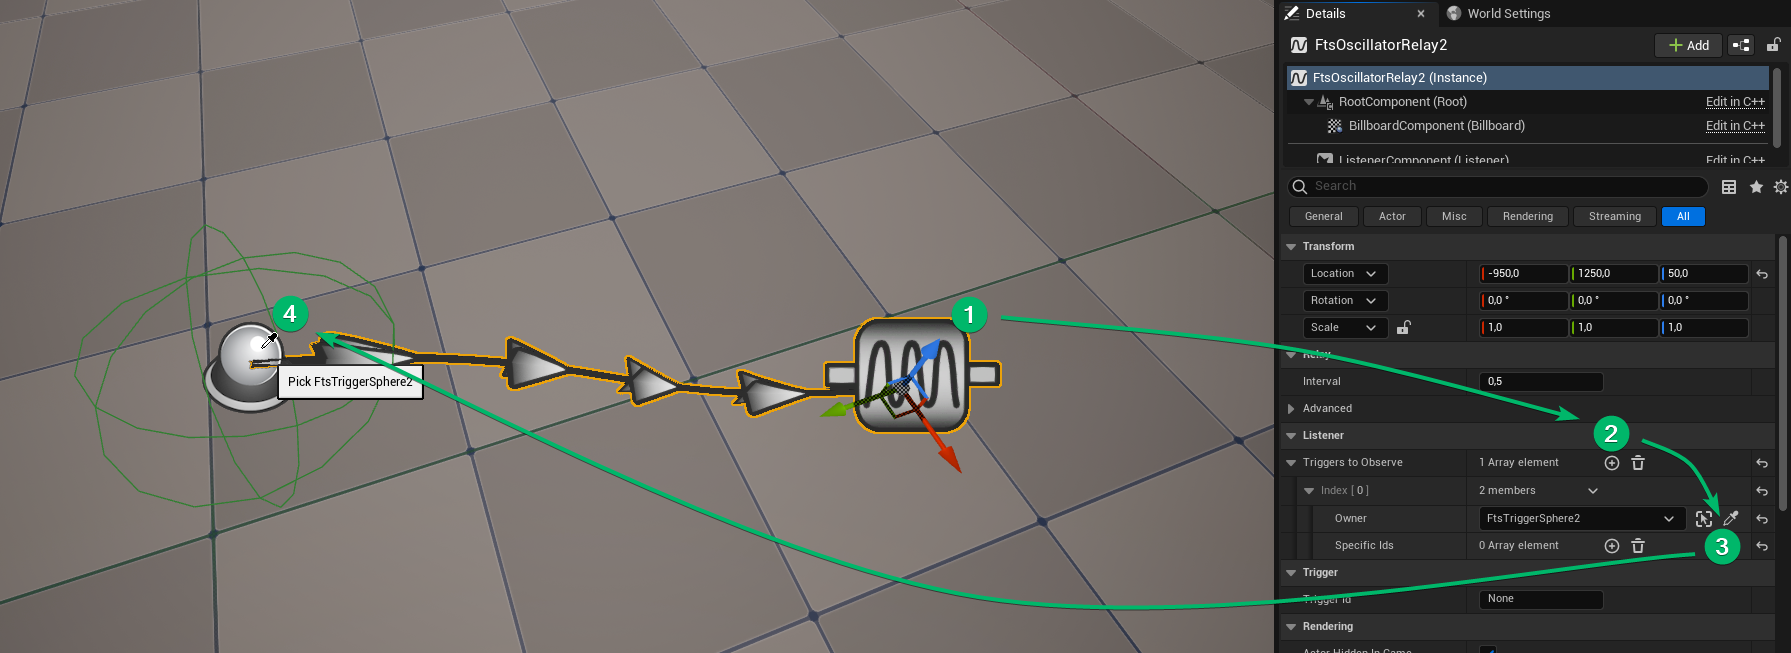
To add a connection between relays, (1) select the relay actor. (2) Go to the Details Panel and add a new entry under Listener -> Triggers to Observe. (3) Using the dropdown or the picker tool select the actor containing the trigger to connect (4).
Some relays support multiple input pins, others only one. Additionally, it is possible for an actor to have multiple triggers which can be distinguished by their ids. See Trigger Ids for how to use them.
To listen for signals add a Fts Trigger Listener component to an actor.

Next register triggers by calling one of the Start Listening functions on the component. Call the equivalent Stop Listening function to unregister. Trigger Ids are covered here. 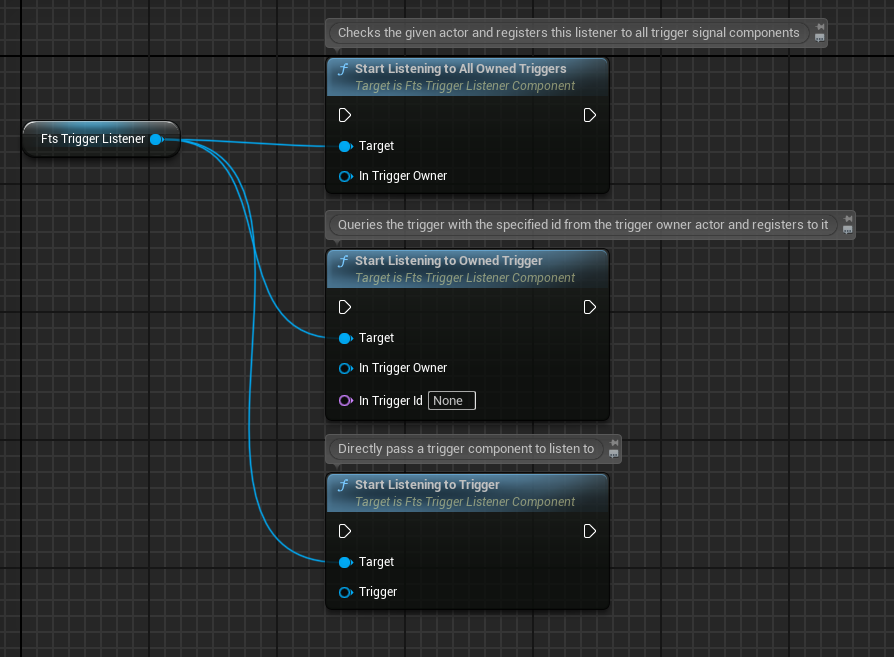
Add an event callback to receive signals. 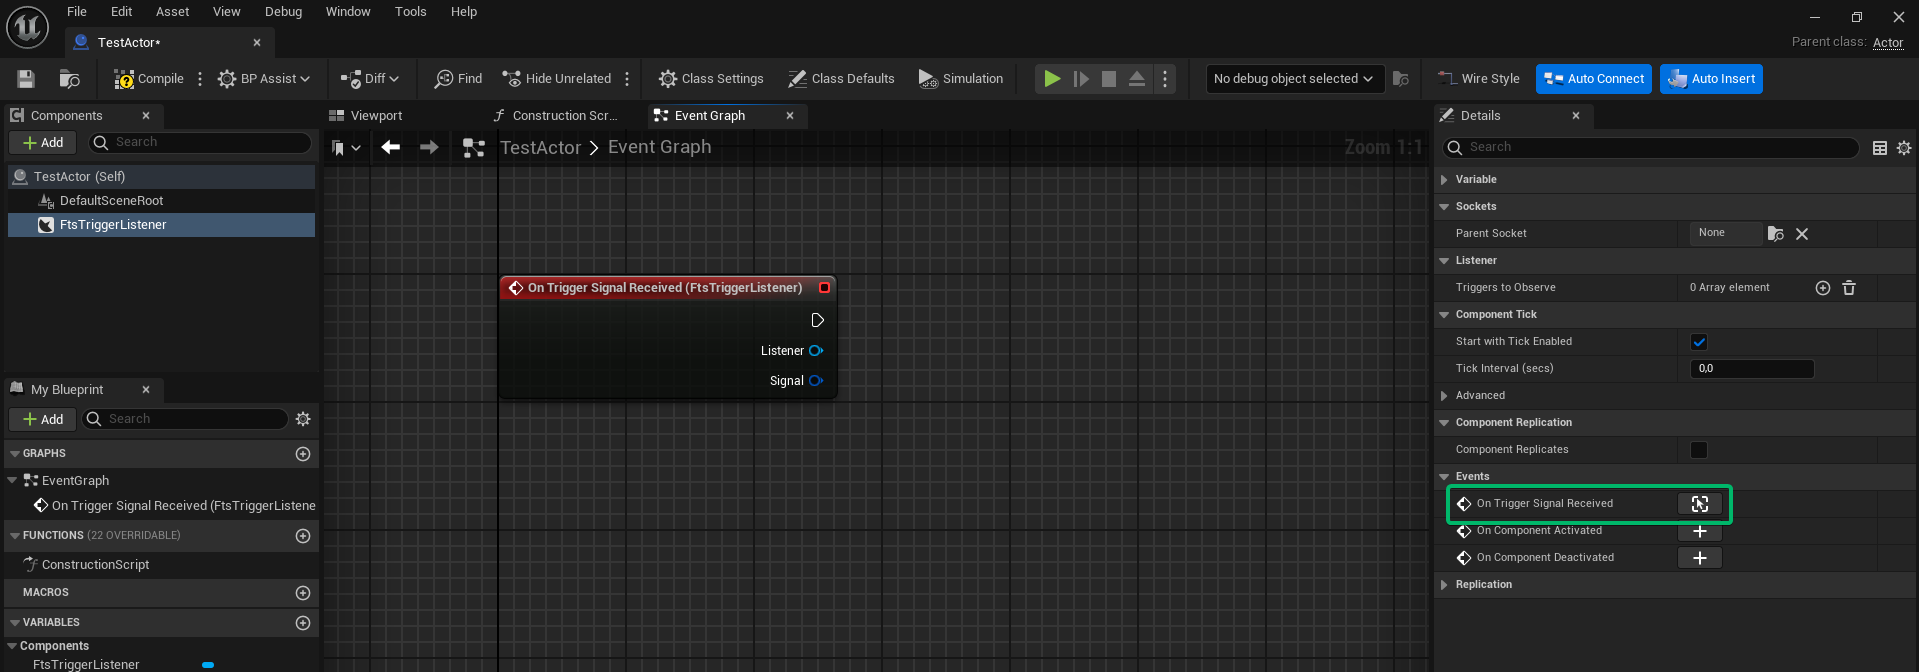
The signal is an Instanced Struct. There are utility methods to query the different contents of a signal. However, arbitrary data can be passed as a signal's payload, see Custom Signal Payload. 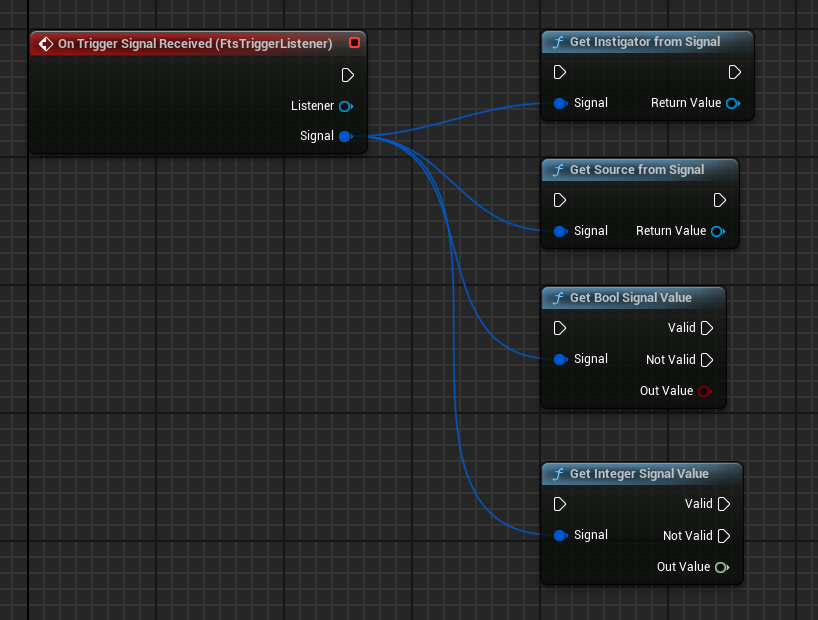
To send signals add a Fts Trigger Signal component to an actor.
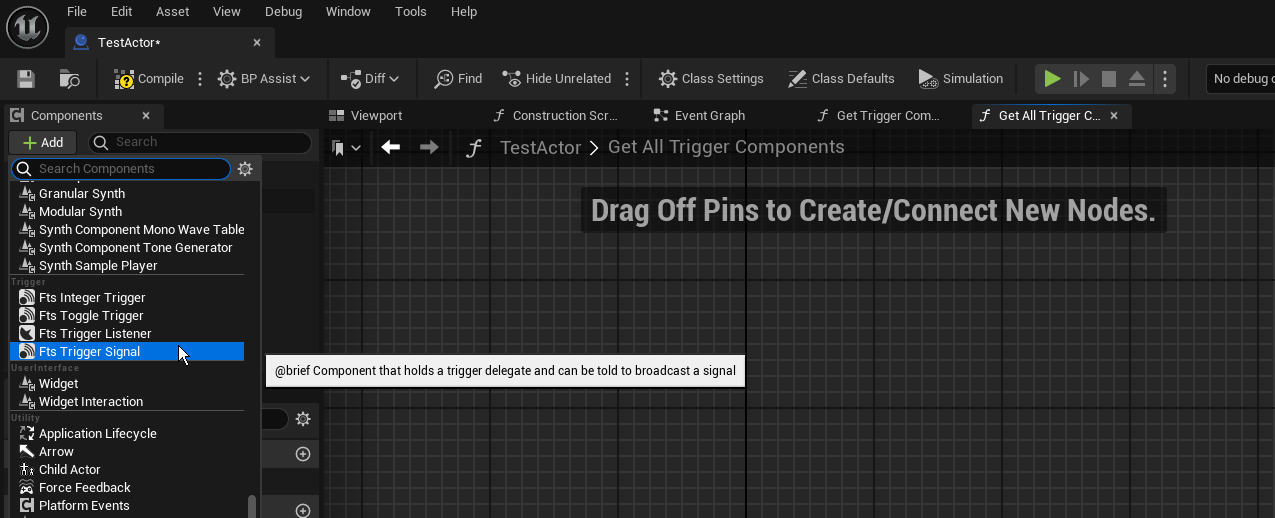
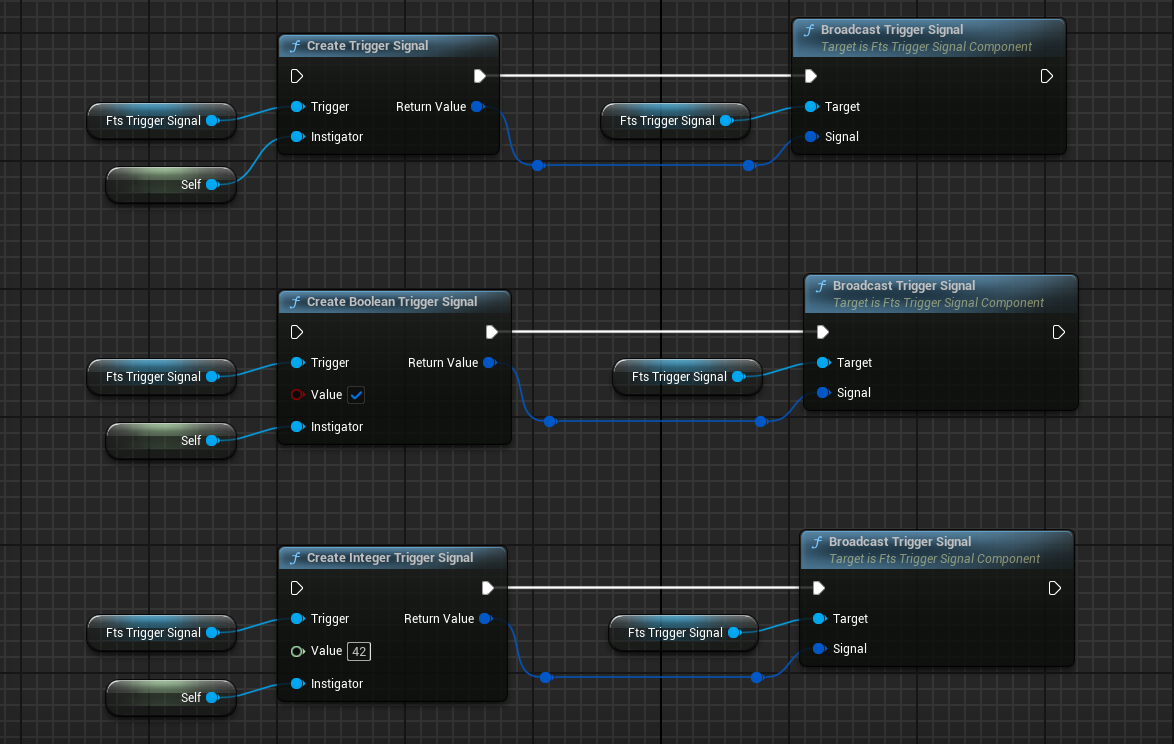
The component can be used to send signals now. Signal types with specific payloads can be created with the following functions, however it's also possible to send custom data.
Telling a listener to start listening to this trigger will connect the two. However, in order for the existing relay nodes to work with this actor it needs to implement the Fts Trigger Owner Interface. This interface is used to query specific triggers on an actor. 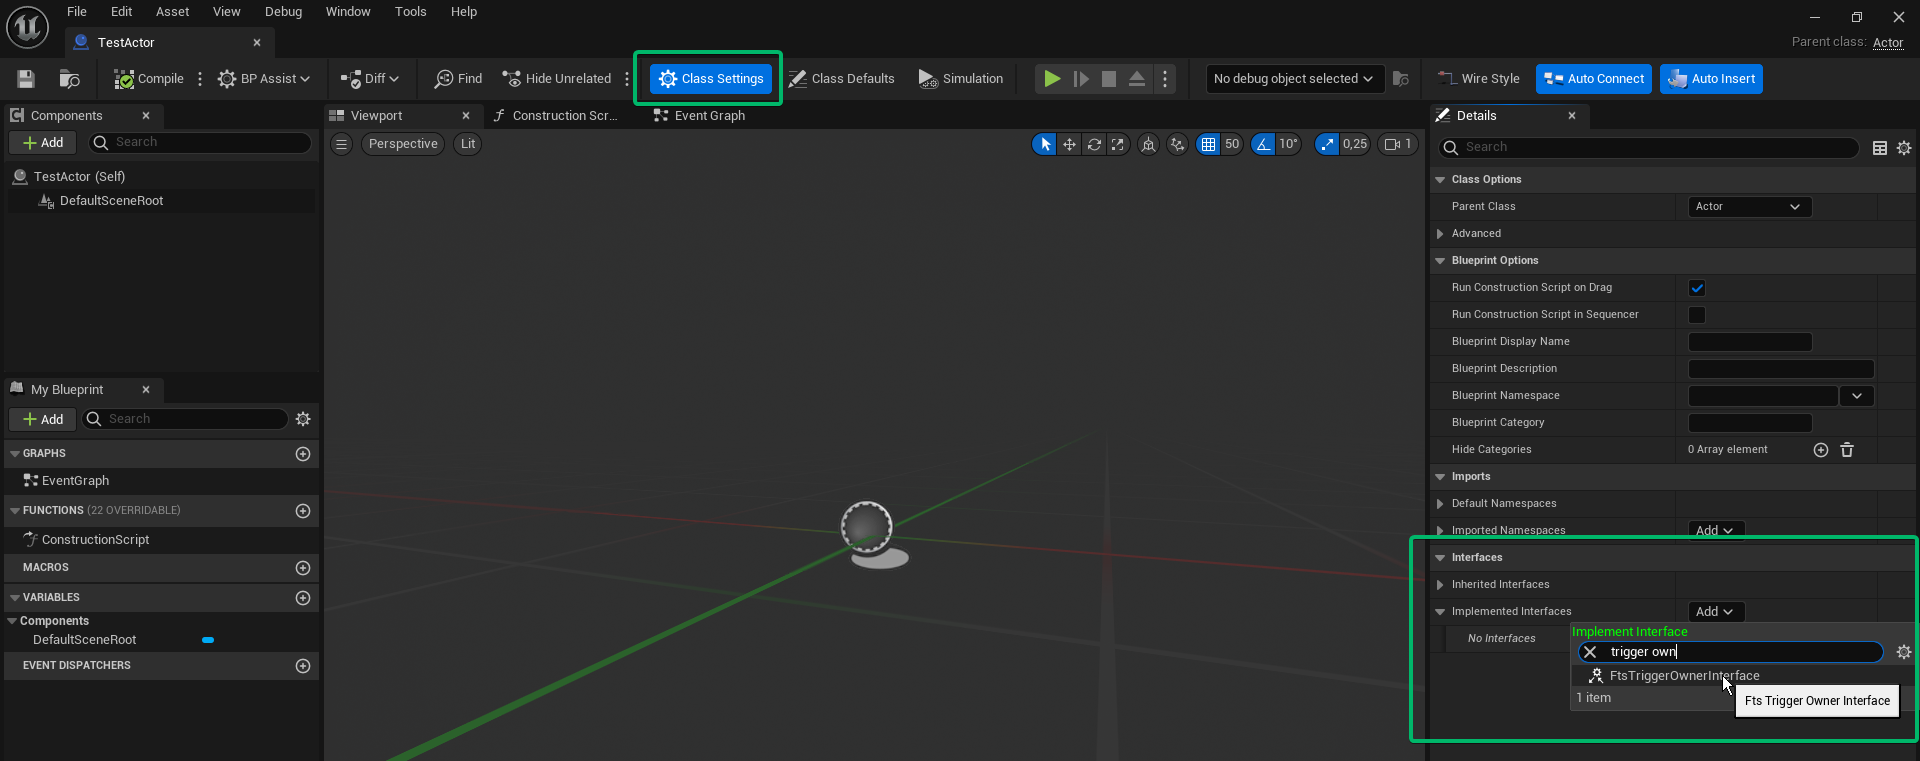
Implement the Get All Trigger Components function. This is used by the listener component when calling "Start Listening to All Owned Triggers". Connect the component to a Make Array node and pass it to the return value. 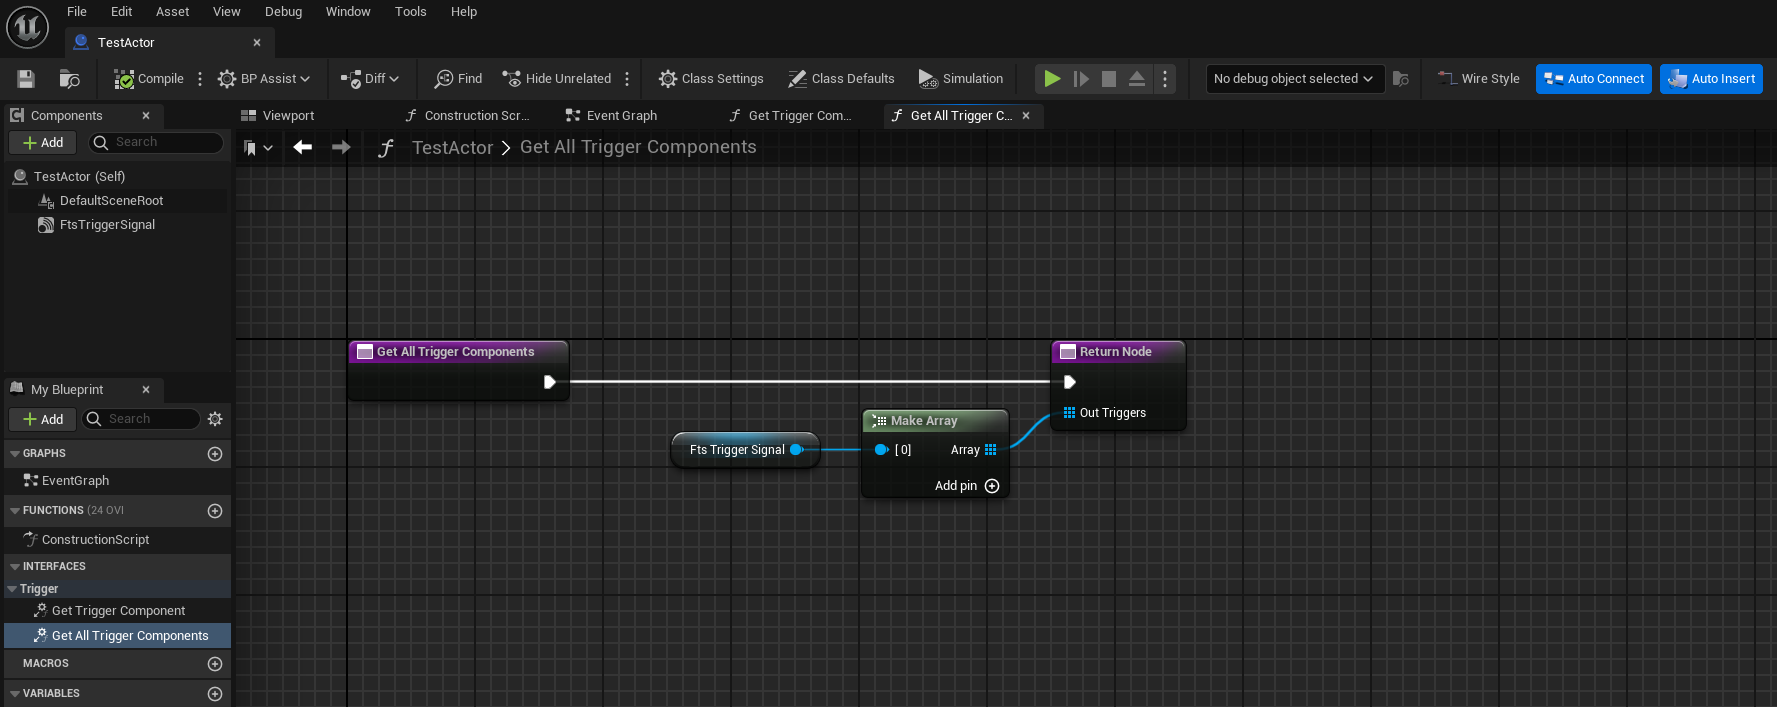
Implement the Get Trigger Component function. Check if the given trigger id matches the component's id and only return it in that case. This is used by the listener to register to a specific trigger. 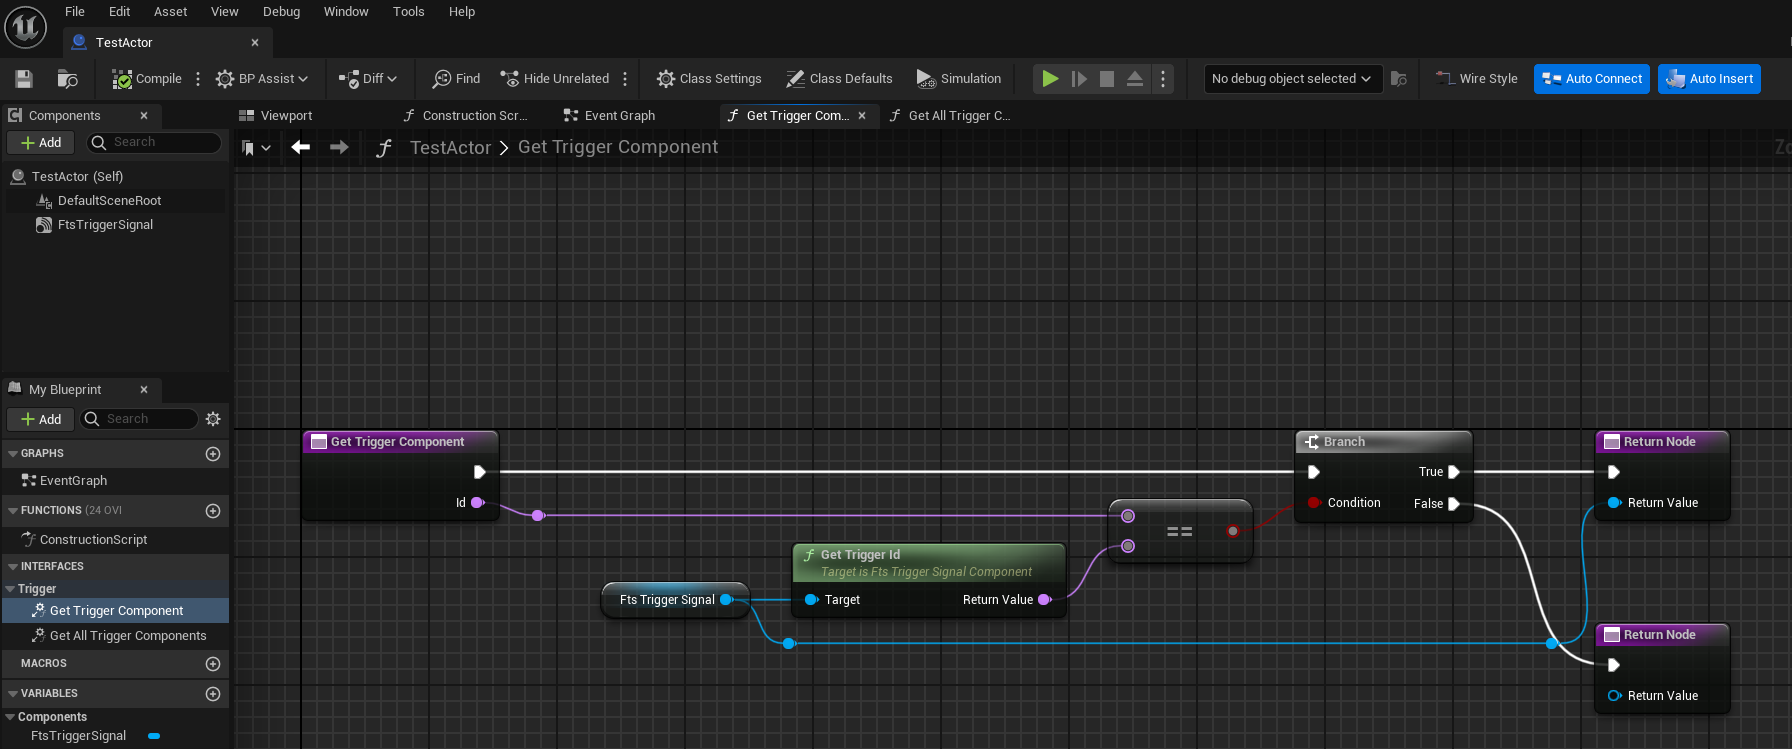
The actor can now be used by the existing relays.
Instead of doing all this manual work, it's also possible to create a custom relay, which has basically the same setup. It's covered in the Custom Relays section.
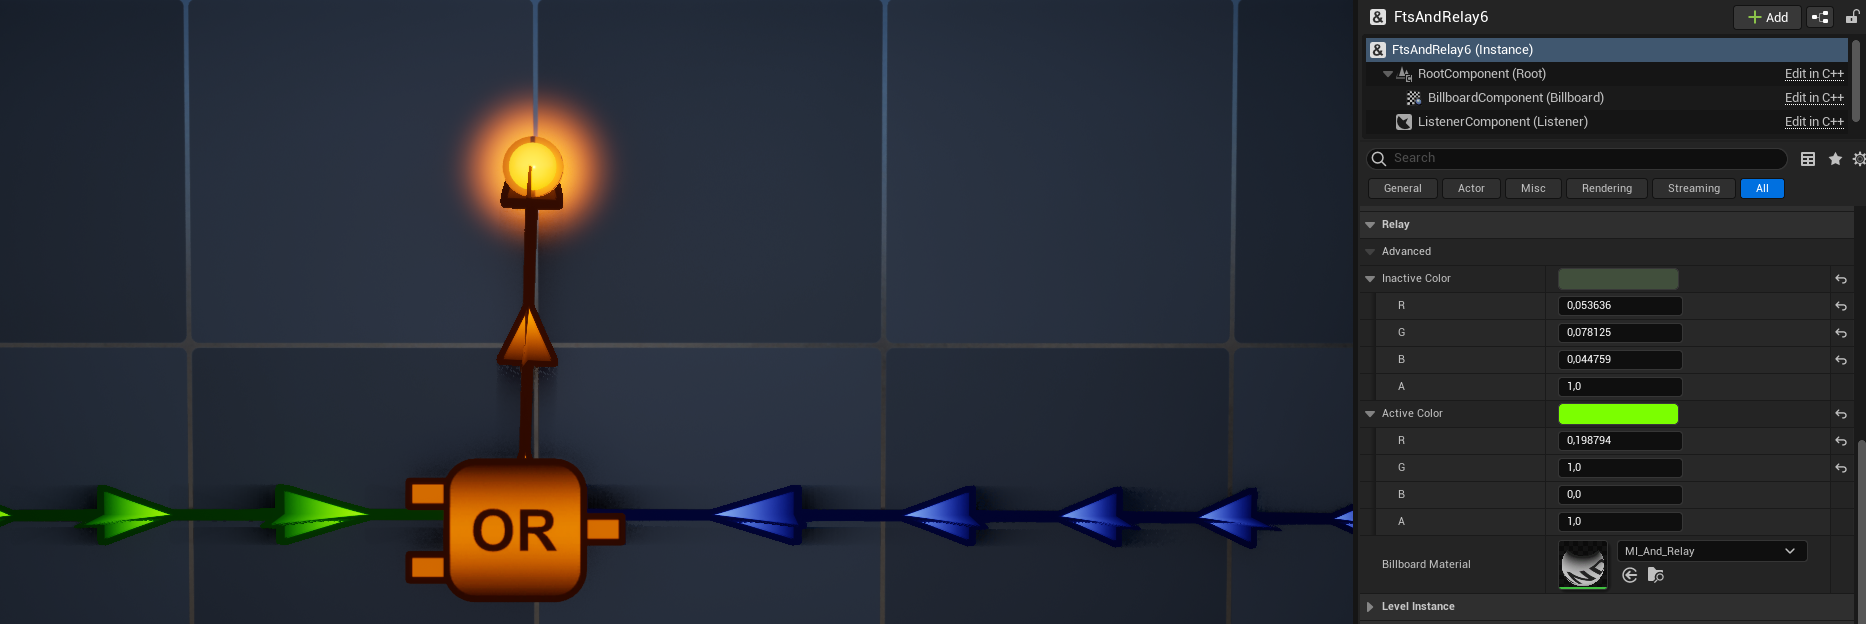
By default, all relays are set to Hidden in Game. By toggling the option off they will show up during gameplay. This only works in editor, for packaged games all visualization is discarded.
Every relay's inactive and active colors can be customized in their details panel. The billboard material can also be changed. The colors and materials have no influence on the behavior or signal payload.
A good way to get a sense of how to use the plugin is to check out the Examples.
The Overview page contains a list of all components and actors within the plugin.
After the getting a handle on the relay system it's worth reading about Advanced Features.